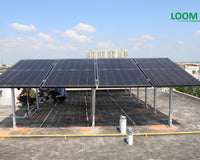
Installing solar panels on a tin shade can be a feasible option for utilizing solar energy. Here is a general guide on how to install solar panels on a tin shade:
-
Assess the Structural Integrity: Before installing solar panels, make sure that the tin shade is structurally sound and capable of supporting the weight of the panels.
-
Determine Solar Panel Capacity: Calculate your energy requirements and decide on the capacity of the solar panel system you need. This will depend on factors such as your electricity consumption, available roof space, and budget.
-
Select the Solar Panels: Choose solar panels that are suitable for installation on a tin shade. Look for panels that are lightweight, durable, and specifically designed for rooftop installations. Consider the efficiency, warranty, and cost of the panels.
-
Install Mounting Brackets: Install the mounting brackets onto the tin shade. These brackets provide a secure foundation for the solar panels. Ensure that they are firmly attached and aligned properly. Use appropriate fasteners that are suitable for the tin material.
-
Attach Rails: Place the rails onto the mounting brackets. These rails will provide the framework for mounting the solar panels. Make sure they are level and securely fastened to the brackets.
-
Connect the Panels: Connect the solar panels to the rails using the provided clamps or mounting hardware. Follow the manufacturer's instructions for proper installation. Ensure that the panels are aligned correctly and have a secure connection.
-
Wire the Panels: Connect the solar panels together in a series or parallel configuration, depending on your system design. Use appropriate wiring and connectors to create a circuit. It is recommended to hire a professional electrician for this step to ensure safety and compliance with electrical codes.
-
Install Inverter and Wiring: Install the solar inverter, which converts the DC power generated by the panels into usable AC power. Place the inverter in a suitable location and connect it to the solar panel system. Install the necessary wiring to connect the inverter to your electrical panel or grid connection point.
-
Secure the Wiring: Route and secure the wiring from the solar panels to the inverter and electrical panel. Use conduit or appropriate cable management systems to protect the wires from environmental factors and damage.
-
Test and Inspect: Once the installation is complete, have a professional technician inspect and test the system to ensure proper functioning and compliance with safety standards.
It is crucial to note that installing solar panels involves working with electricity and may require permits or approvals from local authorities. It is advisable to consult with a professional solar installer or electrician to ensure a safe and efficient installation process.


